- In order for server certificate to be found by WCF wsHttpBinding’s serviceCertificate, the certificate must be stored in LocalMachine
Notes below describe the process of creating a self-signed certificate, storing in Localmachine, import it to Trusted Root CA, and then use it to sign other certificates to be used for server and client
Generate a self-signed Certificate and Root Trust it
Steps:
- Launch Vs2010 Command Prompt:
Start -> All Programs -> Visual Studio 2010 -> Visual Studio Tools -> Visual Studio Command Prompt (right click and Run as Administrator) - Create a self-signed (-r), private key exportable (-pe), saving to personal folder (-ss my) under local machine (Local Computer, sr localmachine), named (-n) “YangsoftCA”,common name (-in) “Yangsoft.com” with private key file (-sv) as “YangsoftCA.pvk” and public key file “YangsoftCA.cer”Command:
C:\Windows\system32>makecert -r -pe -ss my -sr LocalMachine -n “CN=YangsoftCA” -sv “YangsoftCA.pvk” YangsoftCA.cer
SucceededPassword was prompted to secure the private key file
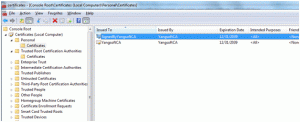
- Open certificate.msc, and this certificate “YangsoftCA” appear under Local Computer / Personal store:
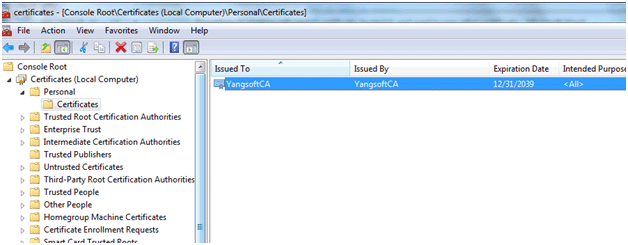
Figure 1 Certificate created by makecert.exe appears under Local Computer/Personal folder
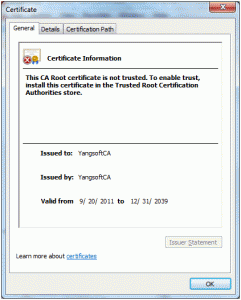
- We intended to use this certificate as root level certificate authority so it can be used to issue chain trusted certificates for encrypting communications between server and client, as well as authenticating web clients that are going to access the WCF service hosted on the server. At this point, when I double clicked on the certificate and opened up the property window, it said that the certificate authority was not trusted, as shown in Figure 2:
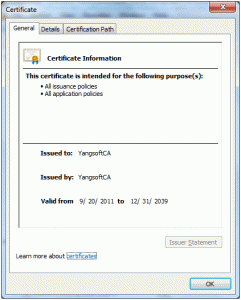
- To make this certificate the root of the trust chain, imported the YangsoftCA.cer file into the Trusted Root Certificate Authorities store (right-clicked on the certificate, copied and then pasted into Trusted Root Certificate Authorities) ; once I did that, now when I went back to the personal store and opened the “YangsoftCA” certificate, the status changed to “OK”, as shown in Figure 3.
- Now, I can use it to issue other certificates down the trust chain.
Use the Root Trusted Certificate to Issue Chain Trusted Certificates
First, used the YangsoftCA to sign a certificate to be used on server-side; as it is to be used for the server where WCF service is to be hosted, the signed-certificate needed to be saved into local computer:
Command:
C:\Windows\system32>makecert -n “CN=SignedByYangsoftCA” -iv “YangsoftCA.pvk” -ic “YangsoftCA.cer” -pe -ss my -sr localmachine -sv “SignedByYangsoftCA.pvk” SignedByYangsoftCA.cer
Explanation of switches:
- The order of switches does not matter
- –iv and -ic: we used the private and public key files of the Root Trusted CA, “YangsoftCA” to sign this certificate
- –pe: make this new certificate’ private key exportable, which is saved to the file specified in –sv, “SignedByYangsoftCA.pvk”
- –sv: private key file of this certificate
- –ss: store name my=Personal
- –sr: store location, if not specified, it will go to “Current User” which we do not want in this case.
- Certificate file (or public key file): SignedByYangsoftCA.cer
- When this command was run, there were several prompts to enter password. First prompt was for Subject’s password (that is to protect file “SignedbyYangsoftCA.pvk”), the last prompt was for “Issuer”, which was needed to use the Issuer’s private key file, in this case, the “YangsoftCA.pvk”.
Where did it end up?
Opened the Certificates MMC, under Local Computer/Personal store, now we see “SignedByYangsoftCA”. Double click it and we can see the certificate shows as the sub level certificate under the certification path, as shown in Figure 4:
Assign the Certificate Signed by Root CA to Website
Now, let’s assign this certificate to the website that hosts the WCF service. There are two ways to do this. First, we can assign the server-side certificate via system.serviceModelsection in the web.config of WCF Service application, as shown in text box below:
<system.serviceModel>
…
<serviceBehaviors>
<behavior name=”SvcBehavior”>
<serviceMetadata httpsGetEnabled=”true” httpGetEnabled=”false”/>
<serviceCredentials>
<serviceCertificate findValue=”SignedByYangsoftCA” storeLocation=”LocalMachine” storeName=”My” x509FindType=”FindBySubjectName”/>
<clientCertificate>
<authentication certificateValidationMode=”PeerOrChainTrust” />
</clientCertificate>
</serviceCredentials>
<!–this line turned on logging server error that is not thrown to EventLog. Use EventVwr/Application to find more details of the behind scene error; but make sure to turn this off after debugging is done since it will impact performance–>
<serviceSecurityAudit auditLogLocation=”Application” serviceAuthorizationAuditLevel=”Failure” messageAuthenticationAuditLevel=”Failure” suppressAuditFailure=”true” />
</behavior>
</serviceBehaviors>
…
</system.serviceModel>
We can also install the SignedByYangsoftCA certificate to IIS and assign to the website through IIS7. In order for the certificate to be imported to IIS7, we first need to merge the private and public key files of the certificate into a single .pfx file that IIS7 is willing to receive.
Return to c:\windows\system32 and type these commands:
pvk2pfx -pvk SignedByYangsoftCA.pvk –spc SignedByYangsoftCA.cer –pfx SignedByYangsoftCA.pfx
This merged the .pvk and .cer files into an exchangeable pfx file that can be imported to IIS7.
Install Certificate “SignedByYangsoftCA” to IIS localmachine.
- Start IIS7 -> Click on root folder Localhost node
- Double-click on Server Certificates then select “Import” from the “Action” pane to the right.
- Browse to c:\windows\System32\SignedByYangsoftCA.pfx; there is a place to enter password, but ignore it as this is not the password used to protect the private key file. Imported successfully.
- Now, go to the website where I want to assign the server certificate, click on Bindings, highlight the binding and click on Edit
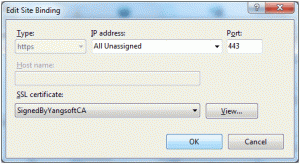
- You can see now the “SignedByYangsoftCA” certificate is showing in the certificates dropdown list; select it and done, Figure 5.
Now that the certificate is assigned, you can remove theentry from the web.config file of the WCF service app and the service should still render to https without problem.
Client Certificate
- Configure IIS7 to require client to have a certificate to access the WCF service:
- Open IIS7 and drill down to the virtual folder where the WCF service is published, in this case, “Demo” directory
- Double click on SSL Settings (on Feature View)
- Check the “Require Client Certificate” and Apply.
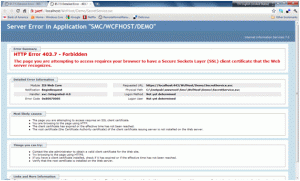
Before a client certificate was issued, I tried to browse to the .svc file and the browser returned this message, as shown in Figure 6:
- Now, let’s use the YangsoftCA that is already in the Root Trusted CA to issue a client certificate and then export as PFX file.Command:C:\Windows\system32>makecert -n “CN=ClientByYangsoftCA” -ss my -pe -sv “ClientBy
YangsoftCA.pvk” -iv “YangsoftCA.pvk” -ic “YangsoftCA.cer” ClientByYangsoftCA.cerExplanation: generated a certificate signed (issued) by root trusted CA, “YangsoftCA”, named “ClientByYangsoftCA”, saved to CurrentUser/Personal Store, and exported private key file “ClientByYangsoftCA.pvk”. - Then merged the private key and public key files into one PFX file:C:\Windows\system32>pvk2pfx -pvk ClientByYangsoftCA.pvk -spc ClientByYangsoftCA.
cer -pfx ClientByYangsoftCA.pfx - Browsed the ClientByYangsoftCA.pfx file and double clicked it, Certificate Import wizard popped up; followed the screen instruction, but ignore the password. I thought this password was the password used in protecting the private key file but when I entered it, it rejected; then I entered no password, and it took it. Is this a bug of what?

